Creating a Custom Market Making Strategy - Part 3
Code: https://gist.github.com/cardosofede/d85a9d5ed5b7414728bcf967b540b9cb
Video:
In this exercise, let’s customize the output of the status command so that we can easily see what’s happening:
- We will use the same file:
quickstart_script_2.py - We’ll add a function that overrides the
format_statusmethod
Let's code
Let’s look at the default format_status method first, which is in the ScriptStrategyBase class that each script inherits from:
Default format_status
    def format_status(self) -> str:
    """
    Returns status of the current strategy on user balances and current active orders. This function is called
    when status command is issued. Override this function to create custom status display output.
    """
    if not self.ready_to_trade:
        return "Market connectors are not ready."
    lines = []
    warning_lines = []
    warning_lines.extend(self.network_warning(self.get_market_trading_pair_tuples()))

    balance_df = self.get_balance_df()
    lines.extend(["", "  Balances:"] + ["    " + line for line in balance_df.to_string(index=False).split("\n")])

    try:
        df = self.active_orders_df()
        lines.extend(["", "  Orders:"] + ["    " + line for line in df.to_string(index=False).split("\n")])
    except ValueError:
        lines.extend(["", "  No active maker orders."])

    warning_lines.extend(self.balance_warning(self.get_market_trading_pair_tuples()))
    if len(warning_lines) > 0:
        lines.extend(["", "*** WARNINGS ***"] + warning_lines)
    return "\n".join(lines)
- Note that the method returns a string; this string will be displayed when the users runs the
statuscommand. - If the markets are not ready to trade, the string will be “Market connectors are not ready”
- There are two lists that we building:
lines: this list appends all the information that we want to show by using the methodextendon the listwarning_lines: this list appends the network and balance warnings
- We can transform a DataFrame to text using the
to_stringmethod - Lastly, to return the final string, the
joinmethod join all the strings that we have in the two lists, adding\nto inject a new line as a separator. - Note that when you ran the
status --livecommand in the previous example, the output that you were seeing was the result of this (un-customized) method.
Now, let’s code our custom format_status method. Add the following code inside the QuickstartScript2 class:
Custom format_status
def format_status(self) -> str:
        if not self.ready_to_trade:
            return "Market connectors are not ready."
        mid_price = self.connectors[self.exchange].get_price_by_type(self.trading_pair, PriceType.MidPrice)
        best_ask = self.connectors[self.exchange].get_price_by_type(self.trading_pair, PriceType.BestAsk)
        best_bid = self.connectors[self.exchange].get_price_by_type(self.trading_pair, PriceType.BestBid)
        last_trade_price = self.connectors[self.exchange].get_price_by_type(self.trading_pair, PriceType.LastTrade)
        custom_format_status = f"""
| Mid price: {mid_price:.2f}| Last trade price: {last_trade_price:.2f}
| Best ask: {best_ask:.2f} | Best bid: {best_bid:.2f} |
"""
        return custom_format_status
- We are using the conditional to see if all markets are ready like the previous example
- We are getting the mid price, best ask, best bid and last trade price by using the connector
- Creating a multiline f-string to show all the variables that we want!
- In this case, we are overriding the original
format_statusbut you may also extend it by appending to thelineslist with another list that contains custom strings.
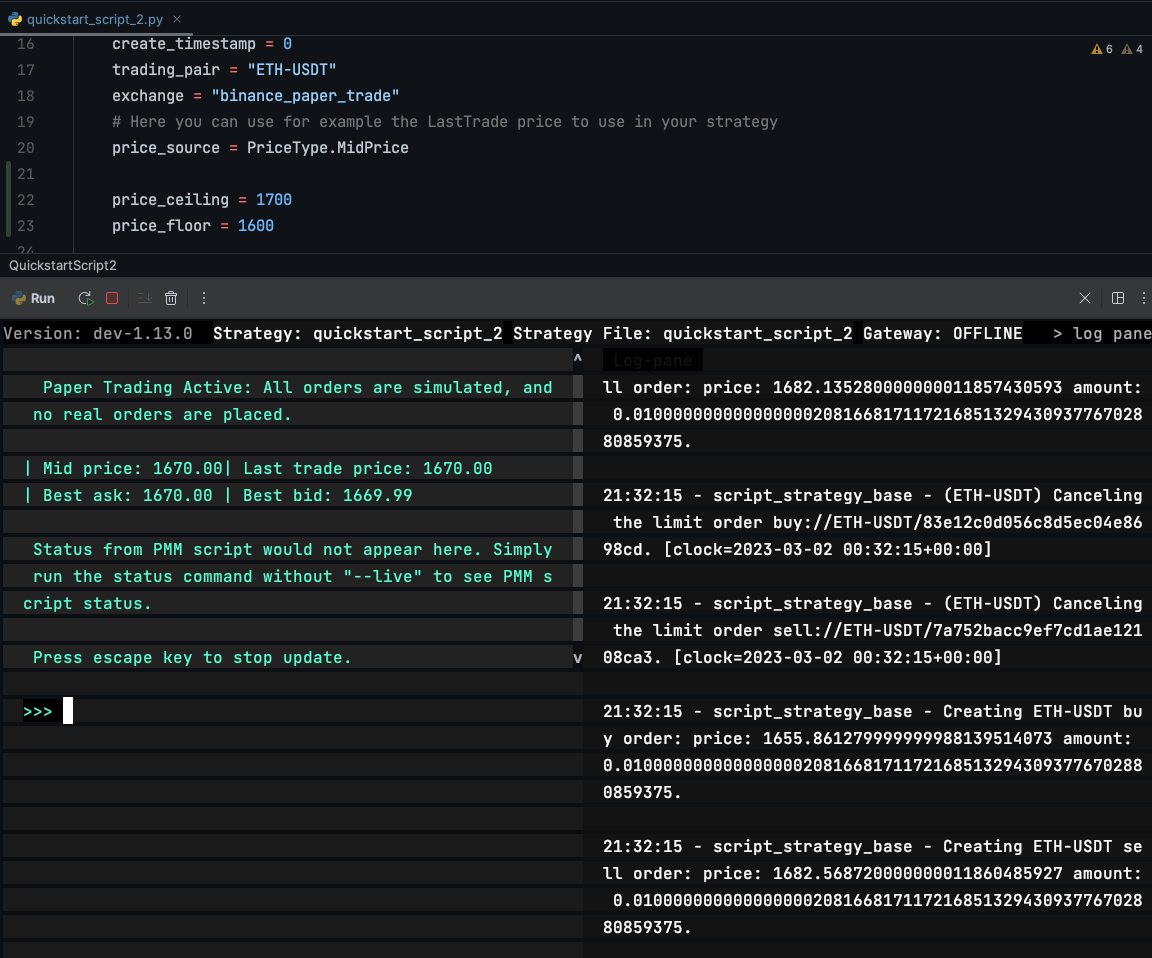
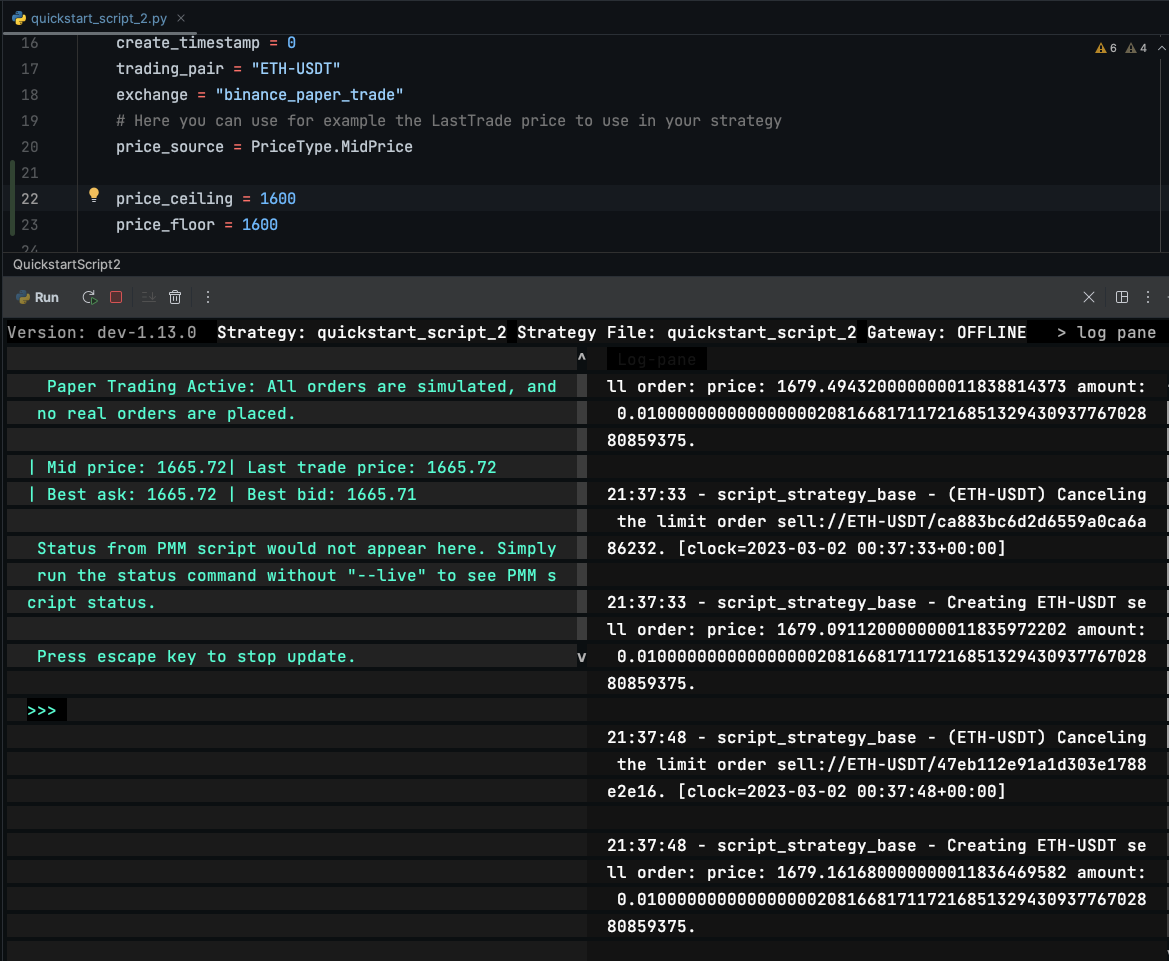
Running the script
- Run the command:
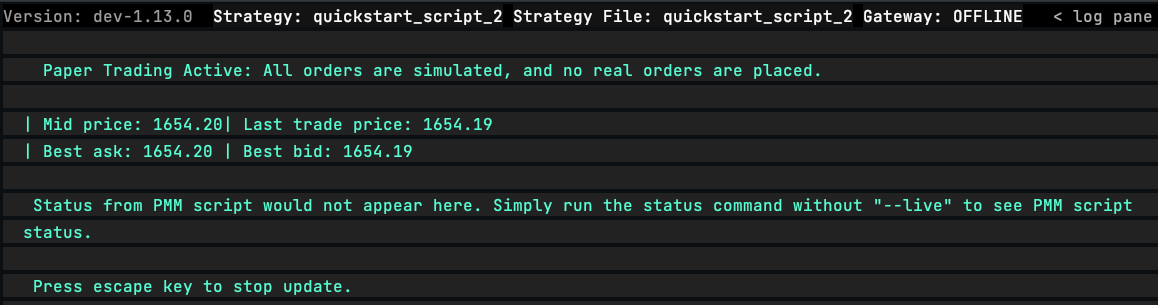
start --script quickstart_script_2.py. - Run the command:
status --liveand you should see:
Next steps
Next, we'll start to customize the market making script!