This brief guide will introduce you to the process of installing and deploying Hummingbot using Docker. You will learn step-by-step how to set up Hummingbot using Docker Compose, a tool for defining and running multi-container Docker applications, and then run your first algo trading strategy!
Install Docker: Step-by-step instructions to installing Docker and Docker Compose,
Hummingbot Interface: Uncover the essentials of the Hummingbot interface, including layout and navigation.
Running a Script: Learn how to run an algo trading strategy as a Hummingbot script.
Connecting API Keys: Master the crucial process of integrating API keys with Hummingbot, ensuring secure API-based bot trading across various exchanges.
Welcome to the Hummingbot Dashboard Quickstart Guide!
While Hummingbot started as a simple CLI-based market making bot in 2019, today it has evolved into a flexible platform that helps you create, backtest, optimize and deploy all types of algorithmic trading strategies.
This guide shows you the basics of how to use the new Hummingbot Dashboard application to create and deploy strategies at scale. Whether you're a seasoned trader or just starting out, this tutorial will provide you with the tools and knowledge to maximize your trading potential.
Welcome to the second part of the Hummingbot Dashboard quickstart. In this section, we'll guide you through the essential steps to set up the project and get Dashboard up and running.
It's a good practice to ensure your Linux system is up-to-date. Updating your system ensures that you have the latest security patches, bug fixes, and system improvements, reducing potential conflicts or issues during installation.
Anaconda is a powerful distribution of Python and R for scientific computing and data science. It's vital for managing different environments for your projects. Download the installer for your environment from the Anaconda website and then run it.
For example, here is how to download and run the Linux installer:
Follow the prompts on the installer screens. If you are unsure about any setting, accept the defaults. You can change them later.
To make the changes take effect, close and then re-open your Terminal window. Afterwards, run the conda command from your path:
conda
You should see a response similar to:
usage: conda [-h] [-V] command ...

conda is a tool for managing and deploying applications, environments and packages.

Options:

positional arguments:
  command
    clean        Remove unused packages and caches.
    compare      Compare packages between conda environments.
Docker is a platform that allows you to develop, ship, and run applications inside containers. It's necessary for ensuring that the dashboard runs in a consistent environment. If Docker isn't installed on your system, click here to follow the installation guide.
The easiest way to install Docker is to install Docker Desktop, which includes Docker Compose along with Docker Engine and Docker CLI which are Compose prerequisites. Here are links to installers for each major OS:
Hummingbot Dashboard is open-source, allowing anyone to access, modify, and contribute to its codebase. To get started, visit the project repository on GitHub at the following link: hummingbot/dashboard.
Once you've cloned the repository and navigated into its root directory, it's time to create a Conda environment. This environment ensures that all the required dependencies for the dashboard are installed and isolated from other projects. Run the following commands:
With the environment activated, initiate the dashboard with:
makerun
It might take a while to load the dashboard for the first time. Subsequent launches will typically be faster. Once the dashboard is up, open a web browser and navigate to https://localhost:8501 to view it.
Congratulations - you've successfully set up the Hummingbot Dashboard. In the next tutorial, we'll delve into managing your credentials and understanding the registration process.
In this section, we'll dive into the importance of securely managing credentials in the Hummingbot Dashboard, ensuring that your information remains private and under your control.
In this method, we manually declare the users and their corresponding passwords in the credentials.yml file.
credentials:usernames:admin:email:[email protected]name:Admin Userpassword:abc# To be replaced with hashed password: hashed_passwords = stauth.Hasher(['abc', 'def']).generate()
In the default file above, the template password abc is a placeholder for the hashed password.
To generate a hashed password for a given string, follow these instructions:
Run conda activate dashboard to ensure that you're in the Dashboard environment is active.
While the method works for 1-2 users, it might be cumbersome if numerous users interact with Dashboard.
Instead, you can edit the preauthorized section in credentials.yml. This method below allows you to whitelist a list of emails and allow users to set their own passwords. Each user is added to the credentials file.
Define a whitelist of emails authorized to access the dashboard.
In the pre_authorized: section of `credentials.yml``, add the emails of users who will be pre-authorized to register and create their credentials.
Once logged in, you have the freedom to navigate through the various sections of the dashboard. However, to log out securely, ensure you return to the main Hummingbot Dashboard page and click the logout button. This ensures optimal security for your credentials and the dashboard's functionality.
In this installment, we show how to utilize the Master Bot Profiles to create and store API keys, along with exploring available scripts in the Hummingbot Dashboard. Let's break down the essentials!
The Master Bot plays a pivotal role in the credential management process in Hummingbot. It serves as a centralized location where exchange API keys and the scripts/strategies available to new bots are securely stored. When spawning new bots from the dashboard, they inherit the encrypted keys and available scripts/strategies from the Master Bot.
In the future, plans are in place to introduce additional bot profiles. Each profile can possess different API keys and available scripts, enabling users to specify the profile they want to use when spawning a new bot.
To test the Master Bot's functionality, we'll connect to the Binance exchange as an example:
Ensure Docker is running, as it's essential for spawning new bots.
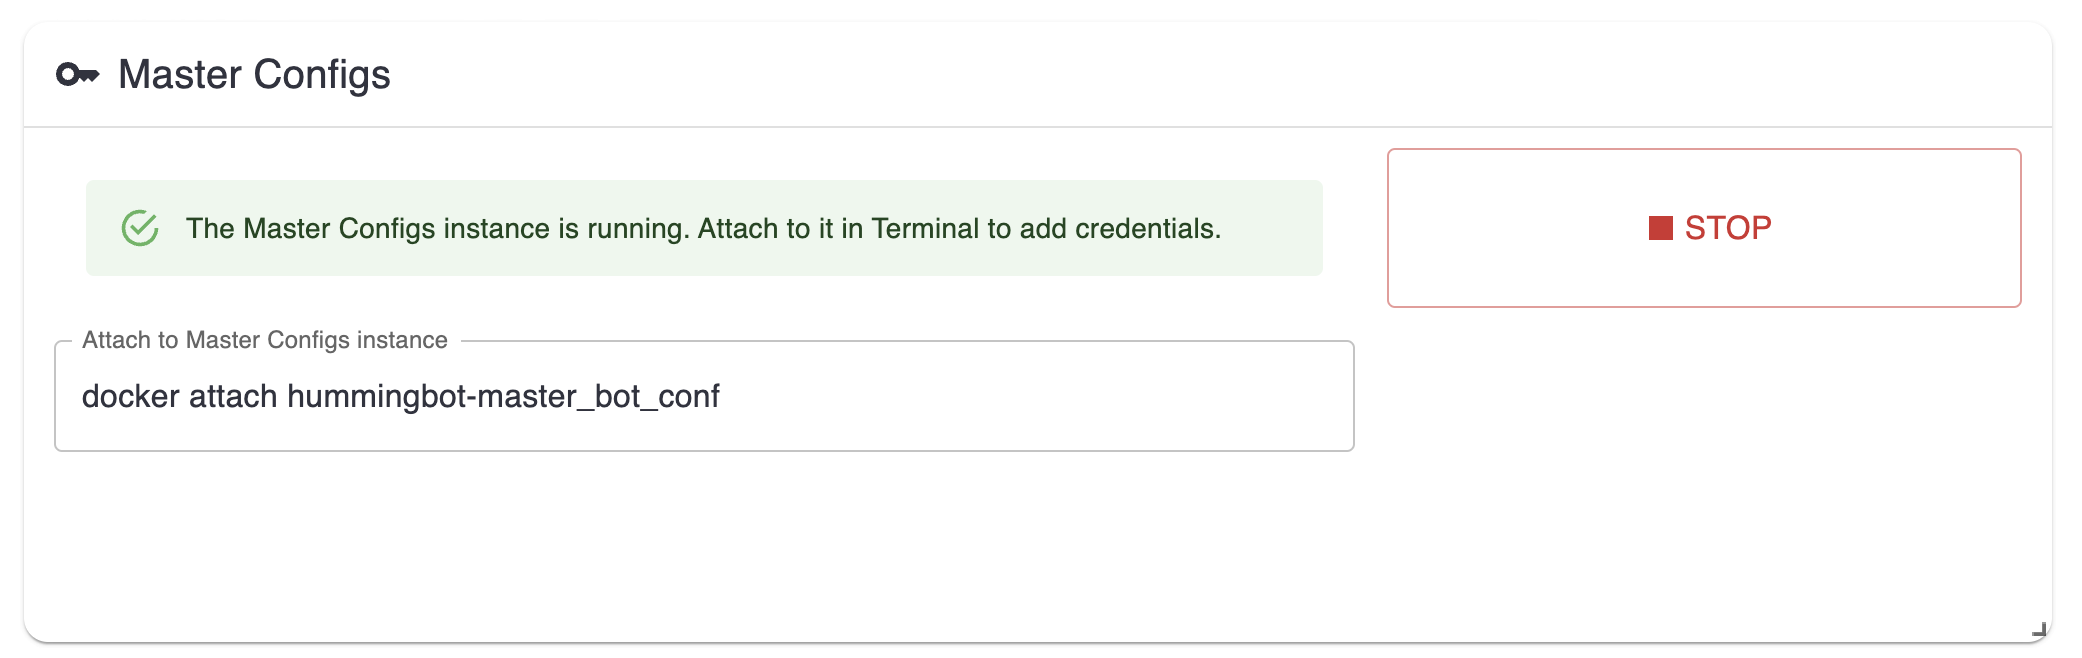
Navigate to the Credentials tab in the dashboard.
Click on the Start button to initiate the Master Bot.
Open a terminal and enter the command docker attach hummingbot-master_bot_conf to attach to the Master Bot.
Connect to the desired exchange (e.g., Binance) and input the required API keys using the command connect binance (replace binance wih the name of exchange you want to connect to).
The Hummingbot Dashboard offers a variety of pre-written scripts that can be utilized as templates for new bots. Here's how you can explore and modify them:
In the dashboard, navigate to the File Explorer.
Browse through available scripts. Those prefixed with "V2" are part of the V2 framework.
For deeper understanding and advanced configurations, consider joining the Bot Camp, which offers comprehensive training on these scripts.
Open any script to view its content. The built-in editor allows for direct modifications.
If you're more comfortable with an external IDE, you can edit scripts there and then upload them back to the dashboard.
The process of integrating credentials and leveraging available scripts is streamlined to ensure both security and efficiency. Whether you're editing scripts directly in the dashboard or using an external IDE, remember to save your changes to any scripts you modify.
If you make modifications in the dashboard's editor, use Apply button to apply changes, and then Ctrl + S to save.
The Master Bot Profile ensures the secure handling of credentials and offers users flexibility in creating bots. Next, learn how to create and manage new instances:
In this tutorial, we'll dive into the process of spawning new bots, starting a strategy, making modifications, and running one for a set duration. Let's get started!
On the instances page, to the right, you'll notice the Hummingbot broker. Before creating any bot, it's essential to start this broker. This component is responsible for enabling communication between the dashboard and the bot, facilitating commands such as starting or stopping a strategy.
On the left, you'll find the creation card. Here, you'll input:
Name of the container
Desired Docker image (useful if you have a custom Hummingbot version with unique strategies)
Profile to start from (for now, only the master bot is available, but more profiles will be added in the future)
Once a bot is created, a card will appear allowing you to select a strategy from those available. After choosing a strategy, press "Start" to launch the bot with the selected strategy.
The strategies available for selection are the same ones present in the master bot. Once you've chosen one, simply press "Start," and the bot will initiate with your chosen strategy.
Below the instances page, the file explorer allows users to view and modify the specific scripts or files for each bot they create. Each bot has its distinct set of scripts that can be adapted to fit specific trading requirements or strategies.
First, import your trading data by uploading the SQLite database file associated with your trading strategy.
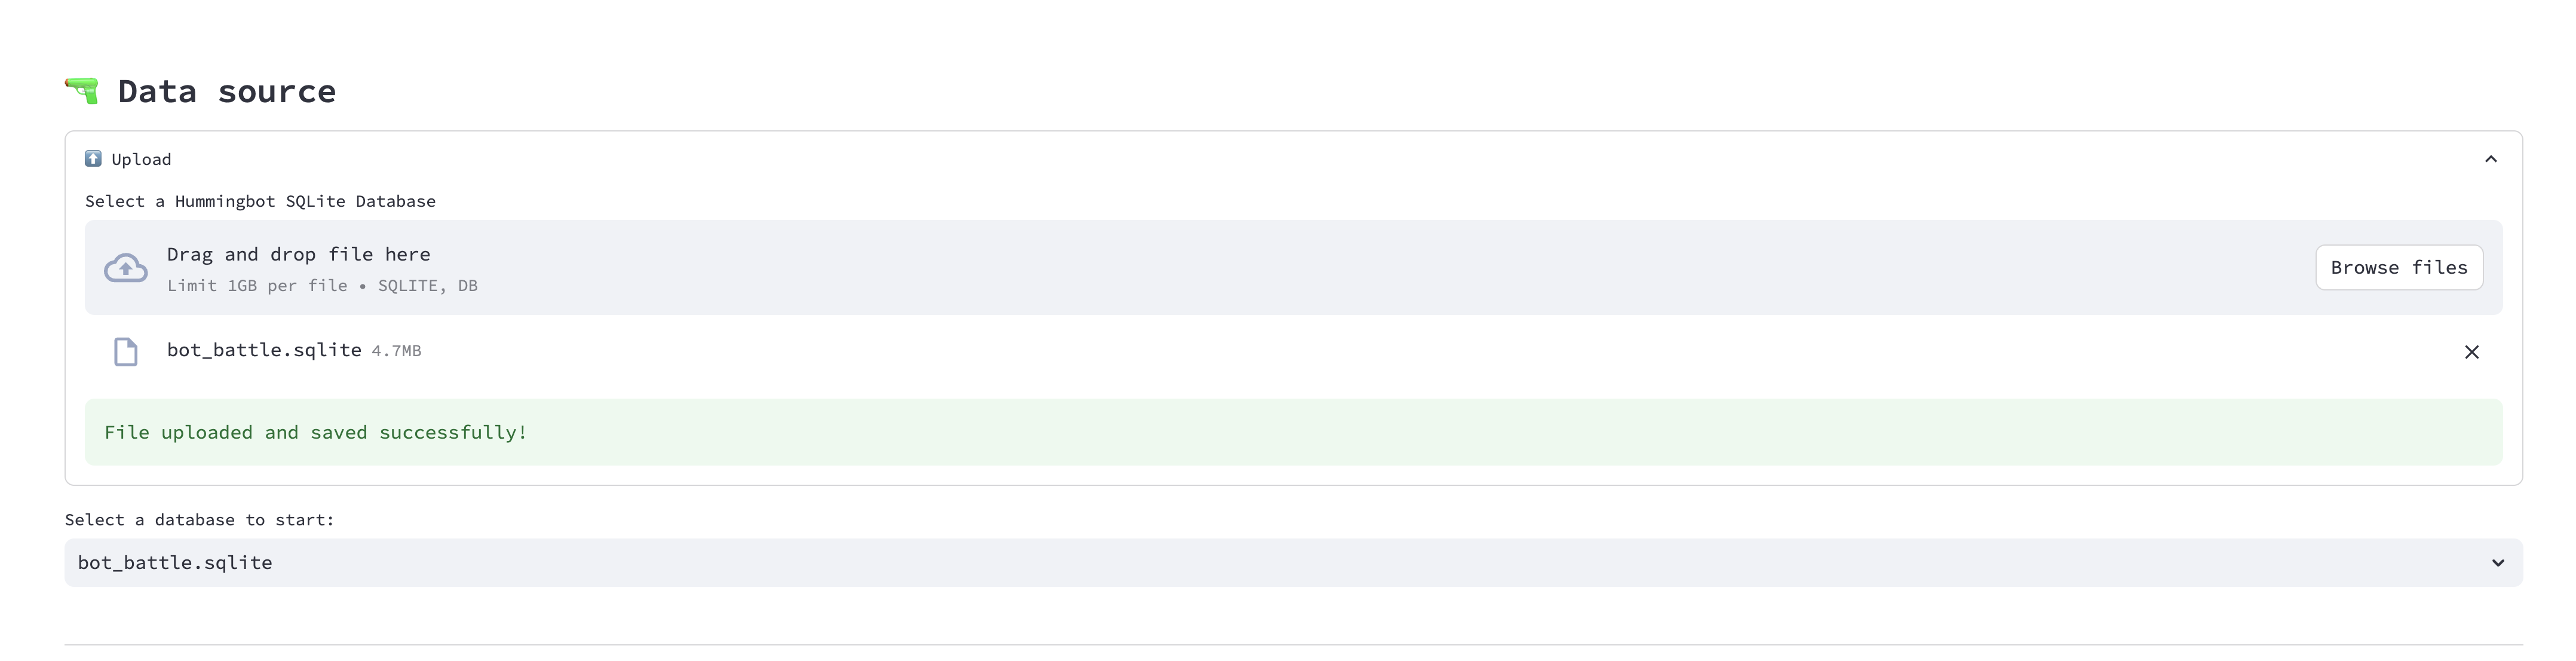
Locate the SQLite Database File: Navigate to the /data folder of your Hummingbot instance. Here, you'll find the SQLite database file named after your trading strategy. For instance, in the provided screenshot, the strategy's name appears to be bot_battle, hence the file bot_battle.sqlite.
Upload the Database File: Drag and drop the SQLite database file into the designated area in the Hummingbot Dashboard. Alternatively, click on "Browse files" to manually search for and select the SQLite database file from your computer.
File Confirmation: After successfully uploading, you'll see a confirmation message stating "File uploaded and saved successfully!".
Select Database: Once uploaded, select the database file from the dropdown menu (e.g., bot_battle.sqlite) to begin analyzing the performance of your trading strategy.
Note
Ensure the database file size does not exceed 1GB.
Continue with the next steps in the Hummingbot Dashboard to dive deeper into your strategy's performance metrics and insights.
With Dashboard's auto-identification feature, the pairs and exchanges in the database file are recognized automatically. Users can then effortlessly select the desired trading pairs for in-depth analysis, streamlining the decision-making process.
The Market Activity Widget provides a detailed visualization of the market's activity over a specific time interval. It allows users to get an in-depth understanding of various metrics including buy/sell orders, profit/loss, and inventory changes.
Usage:
Candles Interval: Use the dropdown to select the desired interval for the candlestick data. Options might include timeframes like 1m, 5m, 15m, etc. This selection determines the granularity of the candlesticks shown in the chart.
Candles per Page: Adjust the number of candlesticks displayed on a single page by changing this value. This can help in narrowing or expanding the time frame viewed at once.
Show Panel Metrics: Click on this button to toggle additional metrics on or off, providing a cleaner or more detailed view based on your needs.
Price Chart: Visualizes the price movement, buy/sell orders, and other metrics over the selected time range. Drag your mouse to get detailed information over a window.
PnL Chart: This chart displays Profit and Loss over time, giving a clear indication of market performance. Positive values show profit, while negative values indicate a loss.
Quote Inventory Change: Provides a bar graph representation of how your the value of your quote assets as a percentage of the overall value of your base and quote assets percentage changes over time, assisting users in identifying significant inventory shifts.
In this chapter, we delve deep into one of the most critical aspects of bot trading: backtesting strategies using historical data. Dashboard provides a comprehensive framework that helps you do everything from downloading historical data to backtesting strategies and optimizing hyperparameters.
First things first, you need historical data to backtest a trading strategy. Dashboard helps you fetch OHCLV candle data from certain exchanges. You can define the exchange, specify trading pairs (separated by a comma), select the time intervals, and choose the number of days for which you want the historical data.
Clicking the "Get data" option will initiate a Docker container running a script that downloads the desired data. The data will be stored in the data folder, in the candles subfolder.
Once you have the data, the next step is to define a strategy controller template for backtesting. The "Create" tab showcases a list of available controller templates.
Current examples include directional strategies such as bollinger v1, macd bollinger v1, and trend following v1, as well as market making strategies such as dman_v1, dman_v2, and dman_v3. You can also create and add your own custom controller.
In the video, we take a deep dive into optimizing the bollinger_v1 controller, which defines a directional trading strategy that uses Bollinger Bands to determine potential buy and sell signals. The strategy considers factors like the length of the Bollinger band, the number of standard deviations, and specific thresholds for taking long or short positions.
Using the Optuna framework, Dashboard can fine-tune hyperparameters automatically. By selecting a strategy and defining specific optimization parameters, you can initiate the optimization process. The system will then try out numerous combinations of parameters to find the most profitable set.
To demonstrate the entire process, we take the example of optimizing the near-usdt trading pair using 120 days of historical 3-minute candles data.
We download the candles data which will be saved inside the /data/candles folder.
Go to the Create page amd select one of the directional strategies. You can use the same values included in the video or use your own.
Next in the Optimize screen, select the strategy name and click Create, change the pair to near-usdt and modify the desired values in the script and save the file.
Select the study name and enter the number of trials and click Run.
Upon completion of optimization, you'll be presented with the results, showing which trials yielded the best net profit and loss (PNL). This gives you a clear understanding of which strategy parameters work best.
As we conclude this chapter, we set the stage for the next one, where we will analyze the results in-depth using the Hummingbot dashboard and deploy the most promising strategies for real-time trading.
Upon completion of the optimization process, it's time to visualize the results. By selecting a specific experiment, you're presented with a scatter plot showing the net Profit & Loss (PnL) on the Y-axis and the maximum drawdown on the X-axis. Each dot on this plot represents a unique combination of strategy parameters. Hovering over these dots reveals detailed information about each experiment.
When you've identified a promising trial, you can move on to a more granular analysis. By choosing a specific trial, you can view its performance on candlestick charts, giving you a clearer picture of how the strategy would have performed historically.
If a particular configuration resonates with your trading objectives and you believe it's worth deploying, you can save it for later use. This step involves selecting the strategy, viewing its performance, and then saving the configuration for deployment.
You can repeat this process for multiple configurations, allowing you to cherry-pick the best ones for real-time trading.
After saving your preferred configurations, navigate to the Deploy page. Here, you can select the configurations you wish to deploy, assign a name, and initiate the deployment process directly from a controller configuration. Under the hood, this uses a generic script to launch the strategy, so you just need to manage the controller configuration file.
In this live demonstration, we analyze the optimization results for a particular trading pair. We observe the performance of various configurations, considering factors like take profit, stop loss, and time limits. This hands-on approach gives you a practical understanding of how to interpret results and make informed decisions.
After selecting the desired configurations, we demonstrate how to deploy them. These strategies are then run simultaneously, offering a more consistent trading performance that averages out the outcomes of all chosen strategies. This method helps avoid overfitting, ensuring a more stable trading experience.
In conclusion, this chapter equips you with the tools and knowledge to evaluate optimization results critically and deploy the best-performing strategies for real-time trading. It emphasizes the importance of a balanced approach, ensuring that you don't overly rely on a single configuration but rather diversify for better consistency.
Thank you for following along with this series. Your dedication and time spent learning about Dashboard and its various functionalities are greatly appreciated!
Throughout this series, we covered a range of topics, including:
Setup and Credentials: We walked through the initial steps of setting up, connecting credentials, and managing the credentials of the HummingBot instances and dashboard.
Deploying and Managing Bots: You've learned how to deploy new bots and execute various strategies effectively.
Backtesting and Optimizing Strategies : An in-depth exploration of the dashboard's latest features was provided, emphasizing backtesting, optimization, and deployment.
If you're serious about delving deeper and enhancing your trading bot capabilities, consider Botcamp, a professional training program for market makers and algo traders. This comprehensive program combines new content modules and live sessions each month to help you understand the intricacies of the market. You'll learn to create and backtest market making strategies, directional trading, and other strategies using Dashboard.
Most importantly, you'll gain hands-on experience with Bot Battles, Botcamp's monthly bot trading competitions. It's a great opportunity to measure your progress and learn from others. In addition, joining the Botcamp community allows you to expand your professional network, form teams to compete together, and share insights.
Thank you once again for joining us on this journey. I hope the knowledge you've gained here serves you well in your trading endeavors. All the best with your future trading bot projects!