Tutorial
What you'll learn
This tutorial is intended to get you familiarized with the basic concepts of creating a basic Hummingbot strategy that executes a simple limit order.
By the end of this tutorial, you should:
- Have a general understanding of the base classes that serve as building blocks of the strategies
- Have a working strategy
- Be able to build new custom strategies from scratch
Getting started
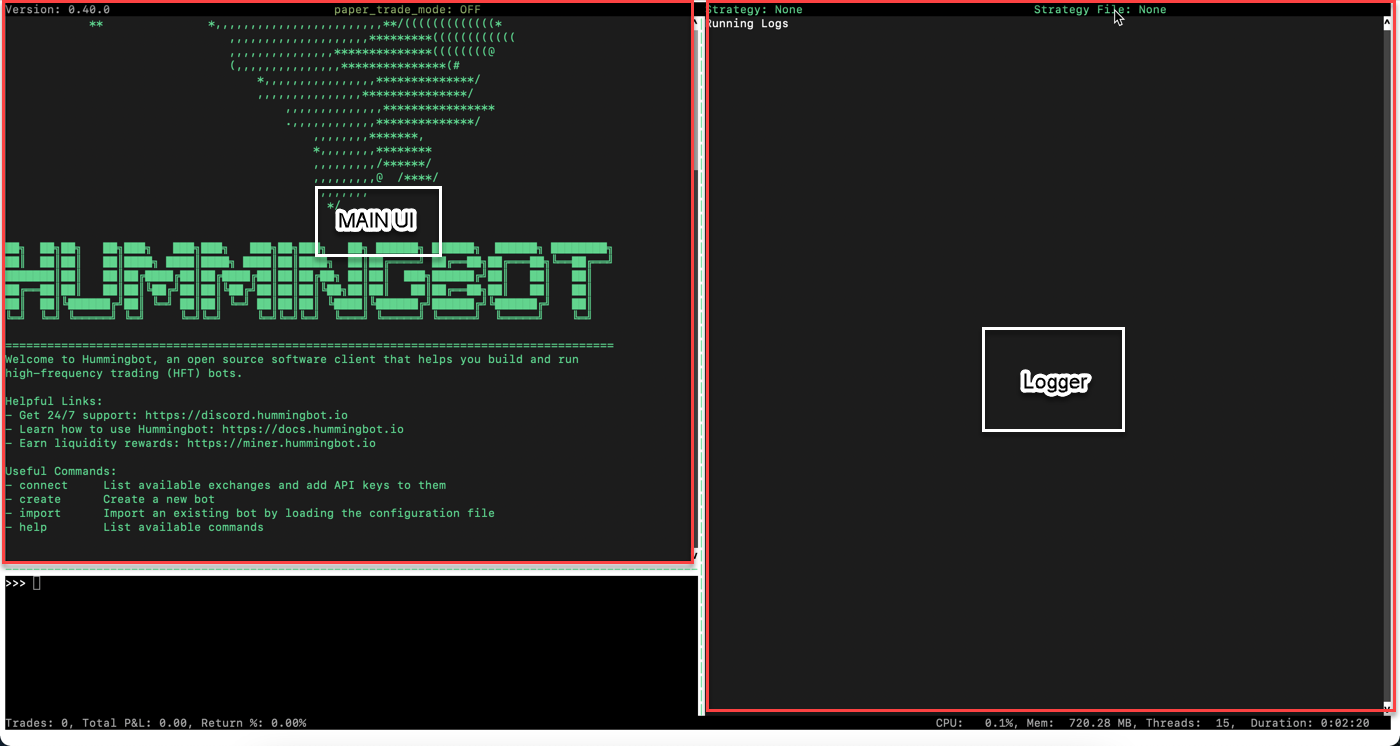
Follow the instructions in Installation and install Hummingbot from source. If the installation was successful, you should see the Hummingbot welcome screen afterwards:
Create a strategy
Let’s create a simple LimitOrder strategy that places a limit order!
Strategy files
For the purposes of this article, we assume that you have installed Hummingbot in a directory ~/hummingbot-instance. From that directory, navigate to the strategy directory that contains all the strategies. Each sub-folder is a different strategy.
limit_order folder which will contain the files for our strategy:
Next, go into the folder and create the four files that we need for our strategy:
Each of these files has a specific purpose and naming convention. See the Developer Tutorial to learn more about the file structure and naming conventions for different strategies.
Lastly, we also need to create a strategy configuration template, which defines the user-configurable parameters defined by the strategy. Like the strategy files and folders, the template file name also follows a convention.
Let’s look at these files individually.
__init__.py
The init file exposes your strategy. Paste the following code into the file using a code editor:
Here, the __all__ field is used to expose the public module LimitOrder for use.
limit_order_config_map.py
The config map file sets the user prompts to set the strategy parameters. The naming convention for this file is {strategy_name}_config_map.py.
Use the following code in your config map file:
from hummingbot.client.config.config_var import ConfigVar

# Returns a market prompt that incorporates the connector value set by the user
def market_prompt() -> str:
    connector = limit_order_config_map.get("connector").value
    return f'Enter the token trading pair on {connector} >>> '

# List of parameters defined by the strategy
limit_order_config_map ={
    "strategy":
        ConfigVar(key="strategy",
                  prompt="",
                  default="limit_order",
    ),
    "connector":
        ConfigVar(key="connector",
                  prompt="Enter the name of the exchange >>> ",
                  prompt_on_new=True,
    ),
    "market": ConfigVar(
        key="market",
        prompt=market_prompt,
        prompt_on_new=True,
    ),
}
The key parameter identifies the field, while the prompt parameter lets you choose the prompt message. If you include prompt_on_new, the prompt will be asked each time the user creates a new strategy. Otherwise, it will only be displayed when the user configures the parameter with config.
In the above example, the strategy field identifies the trading strategy: LimitOrder. Similarly, we use connector field to prompt for the name of the exchange, and the market field to prompt for trading pair that you want to trade. Note that the prompt for market uses a function which uses the value for connector set by the user in the previous question.
Additionally, you can supply validators as parameters to ensure only accepted values are entered, and you can use the default parameter to supply a default value to the parameters. See the ConfigVar file for all the ways that you can set strategy parameters.
start.py
The start file initializes the configuration for a strategy. Paste the following code into the file:
from hummingbot.strategy.market_trading_pair_tuple import MarketTradingPairTuple
from hummingbot.strategy.limit_order import LimitOrder
from hummingbot.strategy.limit_order.limit_order_config_map import limit_order_config_map as c_map

def start(self):
    connector = c_map.get("connector").value.lower()
    market = c_map.get("market").value

    self._initialize_markets([(connector, [market])])
    base, quote = market.split("-")
    market_info = MarketTradingPairTuple(self.markets[connector], market, base, quote)
    self.market_trading_pair_tuples = [market_info]

    self.strategy = LimitOrder(market_info)
In the above code, the connector variable stores the exchange name, whereas the market variable stores the trading pair. These variables fetch the required values from the config map file, which we defined in the previous step.
Similarly, the MarketTradingPairTuple object accepts the exchange name, trading pair, base asset and quote asset for as its parameters.
This information allows us to initialize the LimitOrder object.
limit_order.py
The strategy file defines its behavior. Paste the following code into the file:
#!/usr/bin/env python

from decimal import Decimal
import logging

from hummingbot.core.event.events import OrderType
from hummingbot.strategy.market_trading_pair_tuple import MarketTradingPairTuple
from hummingbot.logger import HummingbotLogger
from hummingbot.strategy.strategy_py_base import StrategyPyBase

hws_logger = None

class LimitOrder(StrategyPyBase):
    # We use StrategyPyBase to inherit the structure. We also
    # create a logger object before adding a constructor to the class.
    @classmethod
    def logger(cls) -> HummingbotLogger:
        global hws_logger
        if hws_logger is None:
            hws_logger = logging.getLogger(__name__)
        return hws_logger

    def __init__(self,
                 market_info: MarketTradingPairTuple,
                 ):

        super().__init__()
        self._market_info = market_info
        self._connector_ready = False
        self._order_completed = False
        self.add_markets([market_info.market])

    # After initializing the required variables, we define the tick method.
    # The tick method is the entry point for the strategy.
    def tick(self, timestamp: float):
        if not self._connector_ready:
            self._connector_ready = self._market_info.market.ready
            if not self._connector_ready:
                self.logger().warning(f"{self._market_info.market.name} is not ready. Please wait...")
                return
            else:
                self.logger().warning(f"{self._market_info.market.name} is ready. Trading started")

        if not self._order_completed:
            # The get_mid_price method gets the mid price of the coin and
            # stores it. This method is derived from the MarketTradingPairTuple class.
            mid_price = self._market_info.get_mid_price()

            # The buy_with_specific_market method executes the trade for you. This
            # method is derived from the Strategy_base class.
            order_id = self.buy_with_specific_market(
                self._market_info,  # market_trading_pair_tuple
                Decimal("0.005"),   # amount
                OrderType.LIMIT,    # order_type
                mid_price           # price
            )
            self.logger().info(f"Submitted limit buy order {order_id}")
            self._order_completed = True

    # Emit a log message when the order completes
    def did_complete_buy_order(self, order_completed_event):
        self.logger().info(f"Your limit buy order {order_completed_event.order_id} has been executed")
        self.logger().info(order_completed_event)
Check out the MarketTradingPairTuple class for more methods to add to your bot.
Both StrategyPyBase class and buy_with_specific_market method derive from the strategy base class. To learn more about other methods you can use using the class, visit Strategy_base.
conf_limit_order_strategy_TEMPLATE.yml
Lastly, we also need an additional file inside the templates folder, which acts as a placeholder for the strategy parameters. First, let’s navigate to the templates folder and create the file. Run the following commands.
Add the following code to this file:
Note
The template filename convention is conf_{strategy_name}_strategy_TEMPLATE.yml.
Running our strategy
Now that we have created a new trading strategy let’s run it in paper trading mode!
First, let’s recompile the code. It's good practice to recompile the code every time you make changes to rebuild any altered Cython code.
Now, start Hummingbot:The Hummingbot UI
Your Hummingbot UI comprises three sections:
- the main interface
- logger
- the input interface
Create the strategy
Follow the steps below to use the strategy we have created.
- Run the command
createto start a new bot - For “What is your market making strategy?”, enter
limit_order - For "Enter the name of the exchange >>> ", enter
binance - For "Enter the token trading pair on binance >>> ", enter
ETH-USDT - Save the configuration file
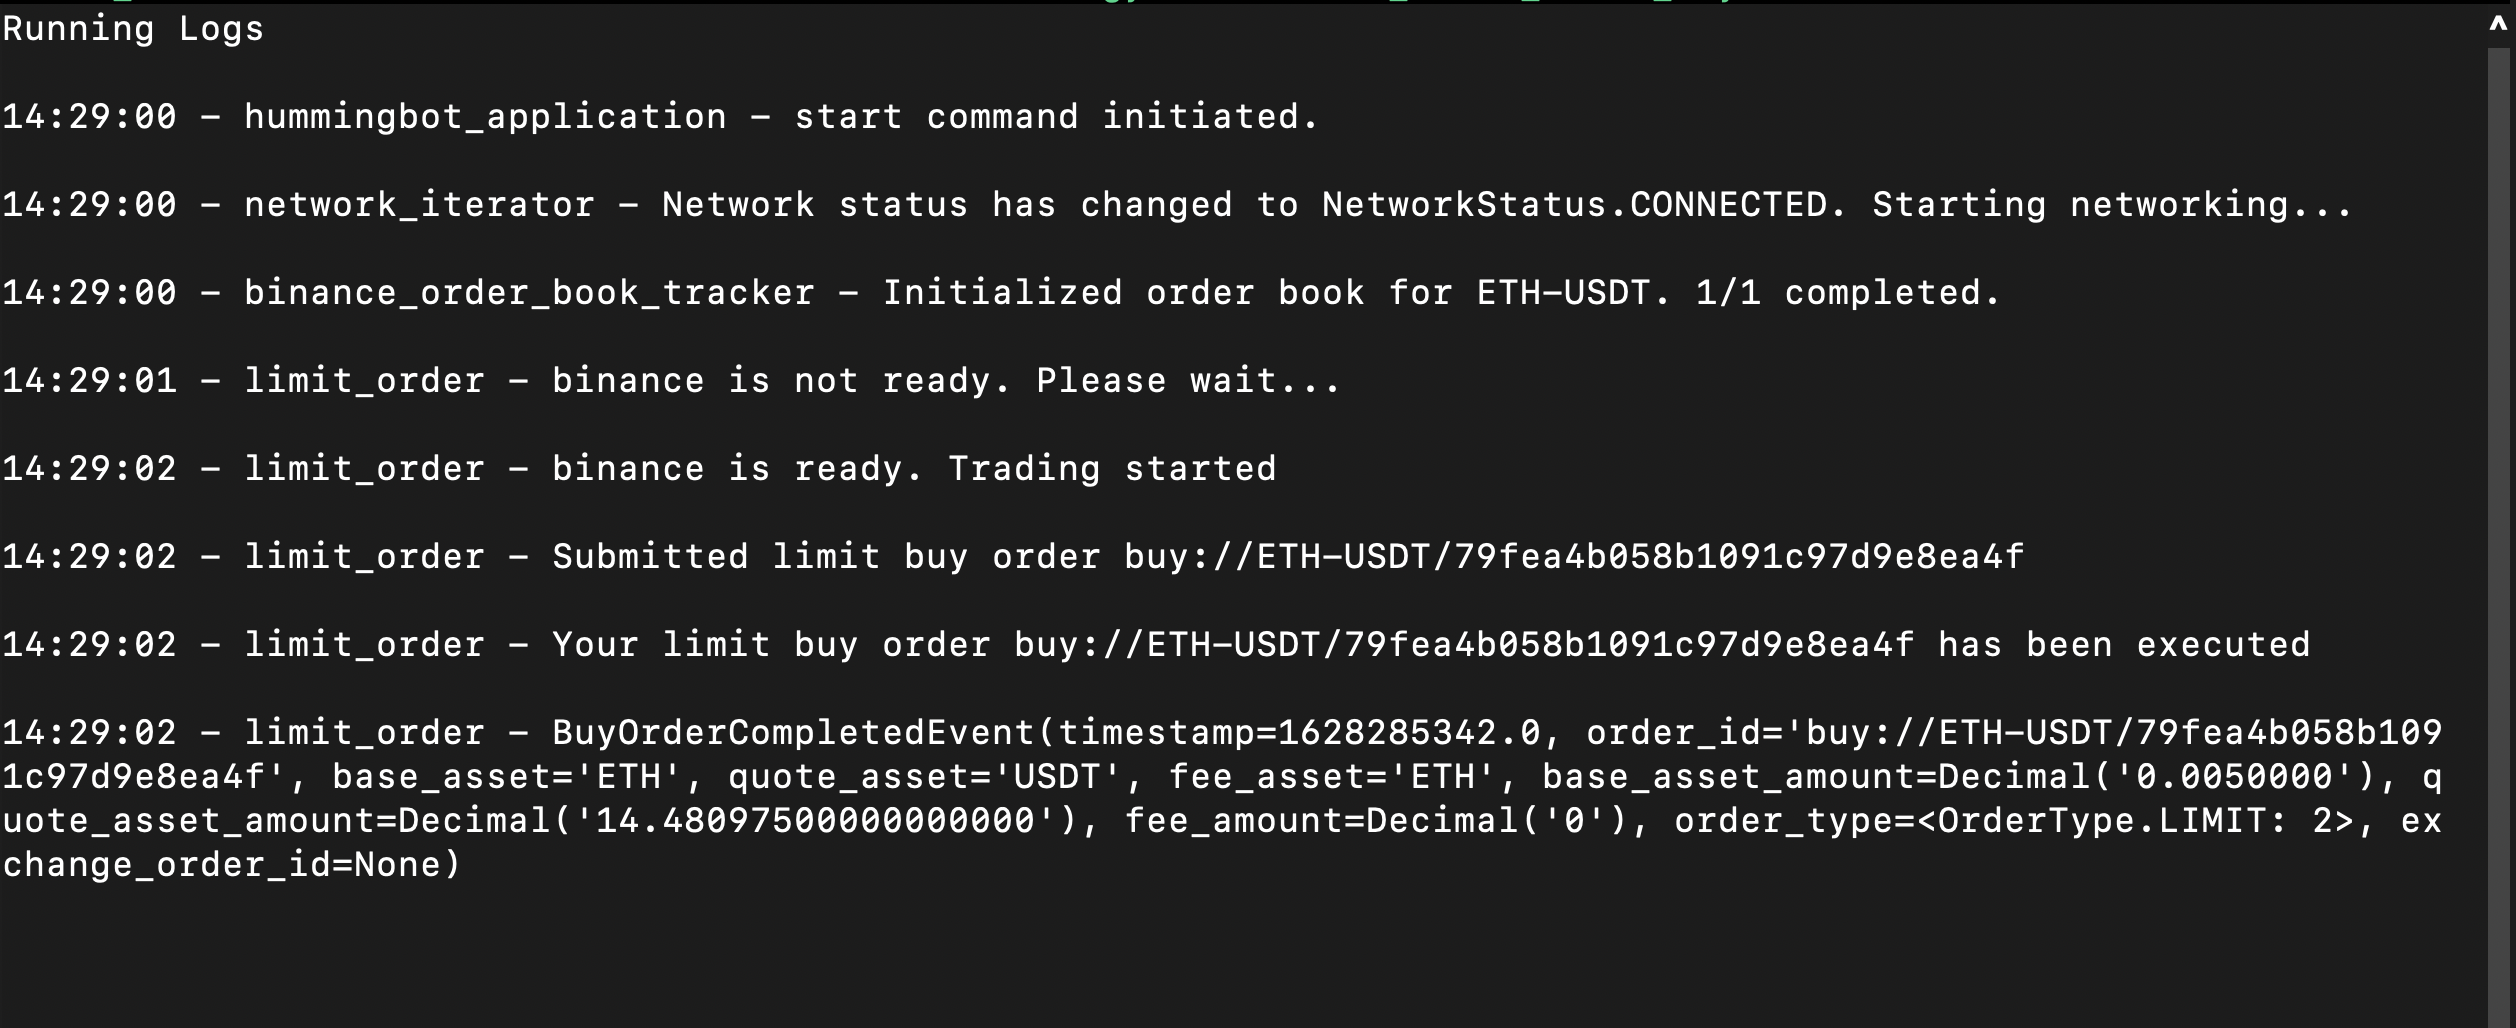
Run the strategy
Run start to run your bot in paper trading mode. You should see the following log messages:
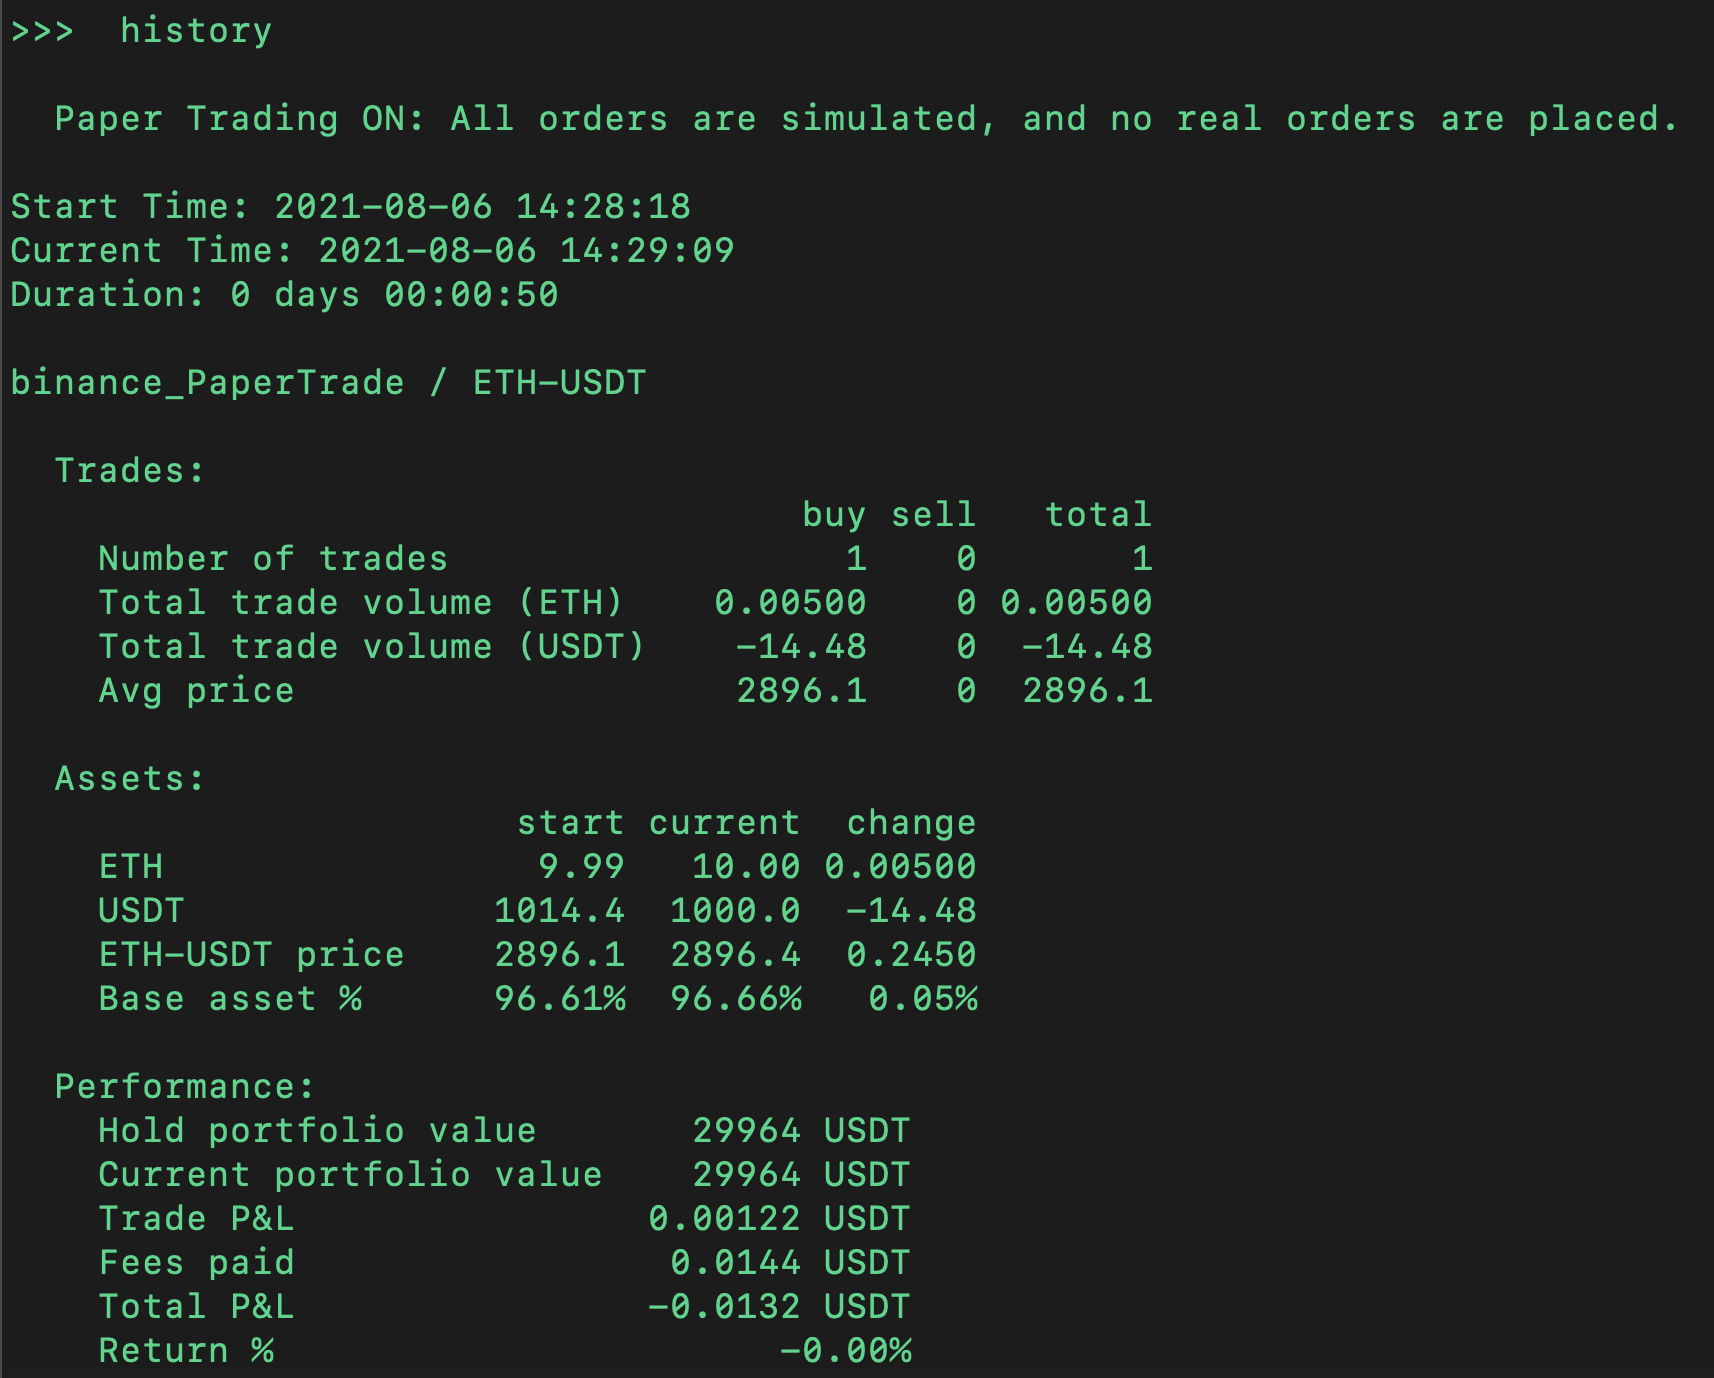
You can also run the history command to see the results of the trade:
Conclusion
Congratulations - you have just created your first trading bot! This bot is very simple but should provide the foundation for you to experiment further. Can you prompt the user to change the order amount or trade type, or chain a series of trades?
Before you know it, you will be creating complex trading strategies combining different exchanges with Hummingbot! To learn more about creating Hummingbot strategies, check out our Developer Tutorial.