Securing Condor and Hummingbot API with Tailscale
If you use Condor to trade from Telegram or the web dashboard, it talks to Hummingbot API on your computer or a cloud server. That API can place orders, read balances, and manage bots—so you should treat it like the front door to your trading stack.
This guide explains why exposing the API is risky, simple steps you can take today, and how to use Tailscale so only your own devices can reach the API—without opening port 8000 to the public internet.
Who is this guide for?
You do not need to be a networking expert. This article is written for traders and operators who:
- Run Condor on a laptop or home machine
- Run Hummingbot API on a VPS or remote server
- Want a private, encrypted link between the two
If you already run both on the same machine with nothing exposed to the internet, you still benefit from the security checklist below.
What can go wrong if Hummingbot API is exposed?
Hummingbot API is a powerful control plane. When it is reachable from the open internet (for example http://your-server-ip:8000 with no firewall), attackers may:
| Risk | What it means for you |
|---|---|
| Unauthorized access | Someone who guesses or steals your login could view portfolios and place trades |
| Credential theft | Exchange API keys stored in the system could be read or misused |
| Bot manipulation | Running bots could be stopped, reconfigured, or used in ways you did not intend |
| Data exposure | Trade history, balances, and strategy details could leak |
Many incidents are not “Hollywood hacking”—they come from default passwords or port 8000 left open on a cloud VM.
Real trading capital is at stake
Condor and Hummingbot API are built for live trading. Treat API access with the same care you would give to exchange API keys.
Security checklist (do these first)
Before or alongside Tailscale, follow these basics. They take a few minutes and greatly reduce risk.
1. Use a strong API username and password
During setup, the installer prompts you to create API credentials. Choose a unique username and a long, random password, and store them in a password manager.
Condor stores these credentials in its server configuration (via /servers in Telegram). Anyone who can read that config can call your API—another reason to keep the API off the public internet.
2. Use a strong config password
The CONFIG_PASSWORD in .env encrypts exchange API keys and other secrets inside Hummingbot. Use a strong value and do not share it.
3. Do not expose unnecessary ports on your VPS
If you host the API on a VPS, confirm that port 8000 (and any other ports you do not intend to publish) are not reachable from the public internet. Providers handle this differently: platforms like AWS often block inbound traffic by default until you add a security-group rule, while other VPS offerings may ship with a permissive firewall already in place.
Check both:
- Your provider's firewall, security group, or network rules in their control panel
- The firewall on the VM itself (for example
ufwon Ubuntu)
If the API should only be reached over Tailscale, there should be no public inbound rule for port 8000.
4. Prefer a private network channel (Tailscale)
Even with auth enabled, exposing port 8000 on a public IP invites automated scans and brute-force attempts. Tailscale puts your machines on a private network (called a tailnet) so Condor can reach the API at an address like http://hummingbot-api:8000 without publishing the API to the world.
| Approach | Public port 8000? | Encrypted tunnel? |
|---|---|---|
| API open on VPS IP | Yes | Only if you add HTTPS yourself |
| VPN / Tailscale | No (recommended) | Yes (WireGuard via Tailscale) |
What is Tailscale? (in plain language)
Tailscale is software that connects your computers and servers into a small private network over the internet—like a VPN, but much easier to set up.
Think of it this way:
- The public internet is a busy street. Anyone can walk past your door if the door is open.
- Tailscale is a private hallway only your devices can enter. Condor and Hummingbot API shake hands inside that hallway.
Under the hood, Tailscale uses WireGuard, a modern encrypted protocol. You get:
- Encryption between devices
- No need to open firewall port 8000 to the world for API access
- Stable names for machines (for example
hummingbot-apiandcondor) via MagicDNS
Tailscale offers a free tier that is enough for personal Condor + API setups. You sign up at tailscale.com.
How Tailscale protects Condor and Hummingbot API
A typical setup looks like this:
flowchart LR
    subgraph PublicInternet["Public internet"]
        Attacker["Scanners / attackers"]
    end

    subgraph Tailnet["Your Tailscale network (tailnet)"]
        Condor["Condor\n(hostname: condor)"]
        API["Hummingbot API\n(hostname: hummingbot-api)"]
    end

    Attacker -.->|"Port 8000 blocked"| API
Condor -->|"Encrypted WireGuard\ne.g. http://hummingbot-api:8000"| API- Condor (Telegram bot + optional web UI) runs on one machine—for example your Mac or a home Linux box.
- Hummingbot API often runs on a VPS where your bots and database live.
- Both join the same Tailscale account (tailnet).
- Condor calls the API using the MagicDNS hostname
hummingbot-api, not your VPS’s public IP.
Traffic is encrypted on the tailnet. The API does not need to listen on a public interface for Condor to work.
Before you start
Gather the following:
| Item | Notes |
|---|---|
| Tailscale account | Free at tailscale.com |
| MagicDNS | Enabled in Admin console → DNS |
| Tailscale auth key | From Admin console → Settings → Keys |
| Two machines (optional) | API server + Condor machine—or one machine for both |
| Docker | Required for the standard Hummingbot API Docker install |
Prepare Tailscale (MagicDNS + auth key)
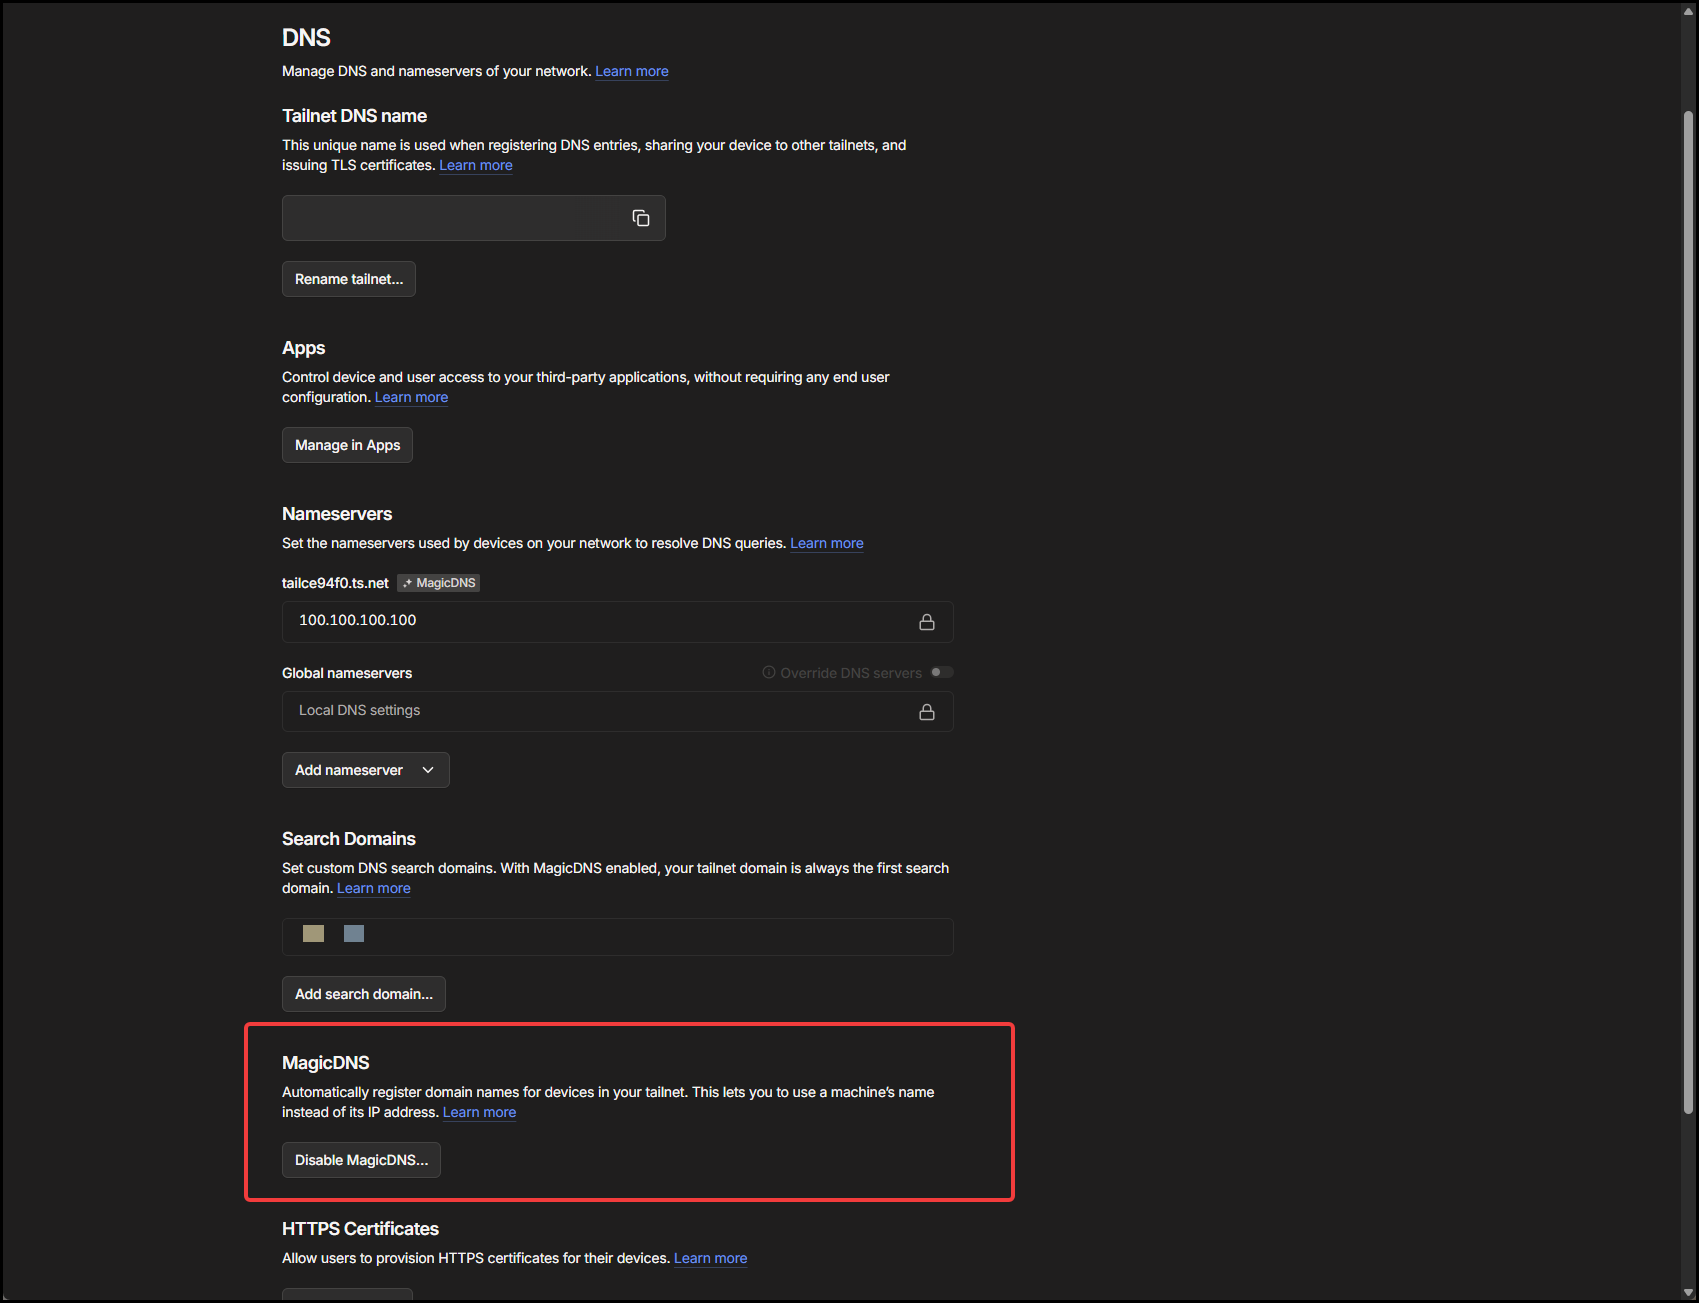
Enable MagicDNS (recommended) so hostnames like hummingbot-api resolve on every device on your tailnet:
- Open the Tailscale admin console → DNS.
- Turn on MagicDNS if it is not already enabled.
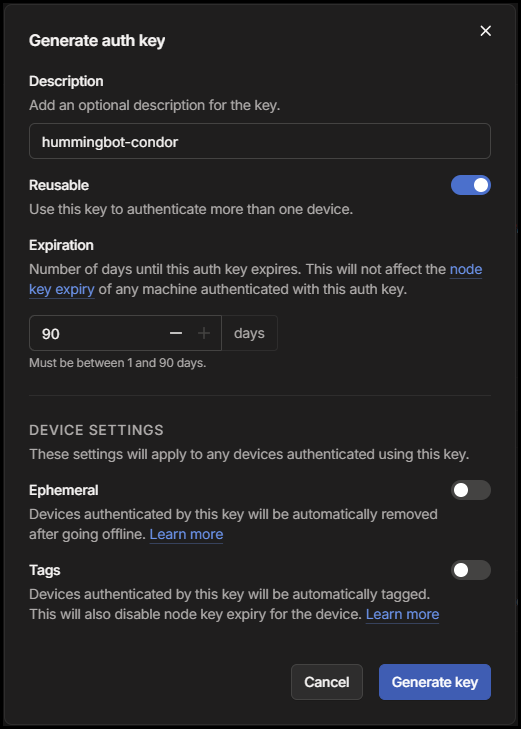
Generate an auth key for joining machines during setup:
- Sign in to the Tailscale admin console.
- Open Settings → Keys.
- Click Generate auth key.
- For home lab setups, enable Reusable if you will connect more than one machine with the same key during setup.
- Copy the key. It starts with
tskey-auth-.
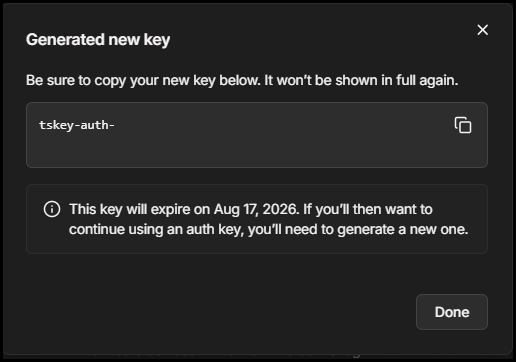
Keep this key secret. Anyone with it can join your tailnet until the key is revoked.
Setup overview: two common scenarios
| Scenario | Where Hummingbot API runs | Where Condor runs | What you run |
|---|---|---|---|
| A — API on a remote server | VPS / cloud | Your laptop or home PC | Install script on API server (--hummingbot-api), then install script on Condor with “remote API + Tailscale” |
| B — API and Condor on one machine | Same machine (Docker) | Same machine | Install script → deploy API locally when prompted → enable Tailscale when asked |
Both scenarios use the same Tailscale ideas; only which machine runs which installer changes.
Part 1: Secure Hummingbot API with Tailscale (remote server)
Use this when the API runs on a VPS or dedicated server and Condor will connect from elsewhere.
Deploy installer: github.com/hummingbot/deploy (Tailscale support is in the Hummingbot API setup flow).
Step 1 — Install Hummingbot API on the server
SSH into your server, then run the one-line installer for the API stack only:
curl -fsSL https://raw.githubusercontent.com/hummingbot/deploy/main/setup.sh | bash -s -- --hummingbot-api
The setup wizard asks for passwords and configuration. When you see:
answer y.
Paste your tskey-auth-... key when prompted.
The wizard sets in .env:
You will also set a strong USERNAME, PASSWORD, and CONFIG_PASSWORD—do not keep defaults on a production server.
Step 2 — Deploy with the Tailscale sidecar
If you used the one-line installer in Step 1, setup already runs make deploy at the end—you can skip this step.
If you cloned the hummingbot-api repo manually and ran make setup, start the stack with:
When TAILSCALE_ENABLED=true, make deploy runs:
A Tailscale sidecar container joins your tailnet with hostname hummingbot-api. The API stays available on the tailnet (for example http://hummingbot-api:8000) without requiring you to expose port 8000 on the VPS public IP.
Step 3 — Confirm the API node is online
On the API server, from the hummingbot-api directory, check that the Tailscale sidecar joined your tailnet:
This runs tailscale status inside the sidecar container. You can also use tailscale status on the host if Tailscale is installed there.
Look for a line with hostname hummingbot-api and no offline in the status column (other devices on your account may appear too—that is normal):
100.64.x.x— Tailscale IP for that machine (yours will differ)hummingbot-api— must matchTAILSCALE_HOSTNAMEin.env(default)-at the end — peer is connected;offlinemeans the sidecar is not on the tailnet yet
If hummingbot-api is missing, check sidecar logs with docker compose logs hummingbot-tailscale and see Troubleshooting below.
Part 2: Connect Condor over Tailscale
Install Condor on your machine (if you have not already):
Scenario A — Condor on another machine, API already on Tailscale
During Condor setup:
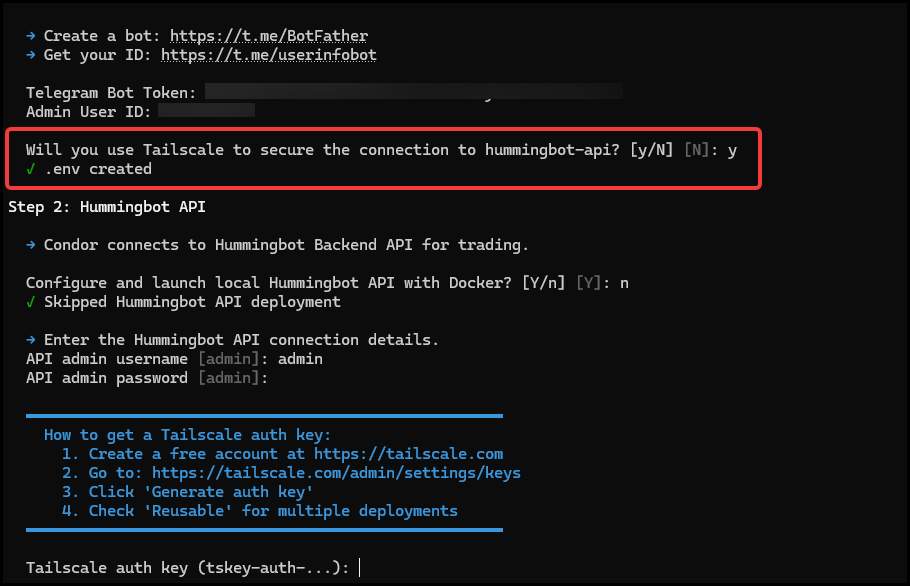
- When asked “Will you use Tailscale to secure the connection to hummingbot-api? [y/N]” → answer
y.
This comes early (before API details). Setup will not ask for a public API URL. - “Configure and launch local Hummingbot API with Docker? [Y/n]” → answer
n(the API is already on your server). - Enter the API username and password you set on the server. Condor uses
http://hummingbot-api:8000automatically (MagicDNS hostname from Part 1). - Paste your
tskey-auth-...key when prompted (same reusable key as the API server is fine). - Condor installs Tailscale on this machine with hostname
condorand joins the same tailnet.
The web dashboard is reachable on the tailnet at http://condor:8088 (MagicDNS) once Condor is running.
Screenshot placeholder
File to add: condor-setup-remote-tailscale.png
What to capture: Condor setup prompt: “Will you use Tailscale to secure the connection to hummingbot-api?”
Scenario B — Deploy API locally with Condor and Tailscale
During setup:
- “Will you use Tailscale to secure the connection to hummingbot-api? [y/N]” → answer
y. - “Configure and launch local Hummingbot API with Docker? [Y/n]” → answer
y(default). - Paste your
tskey-auth-...key, then set API username, password, and config password.
Condor installs Tailscale as condor, clones hummingbot-api, enables Tailscale in .env, starts the stack with the Tailscale overlay, and connects on the same tailnet at http://hummingbot-api:8000.
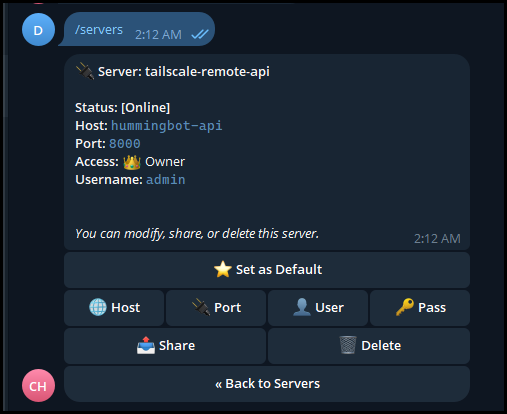
Configure the server in Telegram (if needed)
In your Condor Telegram chat:
- Send
/servers - Confirm the active server points to
hummingbot-api(host) and port8000, with your API username and password.
Verify everything works
Run these checks in order.
1. Both machines on the tailnet
On either machine:
You should see both condor and hummingbot-api (names may vary if you customized TAILSCALE_HOSTNAME).
2. Condor sees the API
In Telegram:
/start— startup message and server health/servers— server should show online (not connection refused or auth error)
3. Optional: ping the API from the Condor machine
Replace credentials with your API login. A successful response means auth and Tailscale routing work.
Network layout (reference)
[Your laptop / home PC]          [VPS / cloud server]
     Condor                           Hummingbot API
  tailnet: condor                tailnet: hummingbot-api
         \                              /
          \    Tailscale (WireGuard)  /
           \                          /
            ===== same tailnet =====
         Condor calls http://hummingbot-api:8000
Both machines must use the same Tailscale account (same tailnet). Auth keys from that account’s admin console are required.
Troubleshooting
| Symptom | What to try |
|---|---|
| Auth key rejected | Key must start with tskey-auth-; check expiry in Tailscale admin; generate a new key |
hummingbot-api does not resolve |
Enable MagicDNS in Tailscale admin → DNS |
| Condor: connection refused | On API server: make tailscale-status; ensure make deploy used the Tailscale compose overlay |
| Auth error in Condor | Match username/password in /servers with API .env |
Only one peer in tailscale status |
Run sudo tailscale up --authkey=... on the missing machine; same Tailscale account |
| API works on server but not from Condor | Confirm Condor machine’s Tailscale is connected; try ping hummingbot-api |
For Docker logs on the API host:
Summary
| Step | Action |
|---|---|
| 1 | Use strong API and config passwords |
| 2 | Create a Tailscale account, enable MagicDNS, and create an auth key |
| 3 | On the API server: install script (--hummingbot-api) → enable Tailscale (deploy runs automatically; use make deploy only after a manual clone + make setup) |
| 4 | On the Condor machine: install script → connect via Tailscale → verify /servers |
| 5 | Run tailscale status on both sides to confirm peers |
Tailscale is not a substitute for strong API credentials—but together they give you authentication plus network privacy, which is what most non-technical operators need when running Condor against a remote Hummingbot API.
Further reading
- Condor documentation
- Hummingbot API documentation
- Hummingbot API installation
- Condor README — Secure Connection via Tailscale
- Hummingbot API README — Secure Connection via Tailscale
- Tailscale documentation
This guide describes security best practices for self-hosted setups. You are responsible for securing your servers, keys, and trading capital. Start with small amounts and verify connectivity before enabling automated agents.